If you’ve been considering ways to make your home more energy-efficient and comfortable year-round, installing a ductless mini split heat pump might be the perfect solution. Whether you’re upgrading an older system, adding heating and cooling to a new room addition, or replacing window AC units, a ductless mini split offers incredible flexibility. Here’s what homeowners need to know about the process of ductless mini split installation in Hibbing, MN.
What is a Ductless Mini Split?
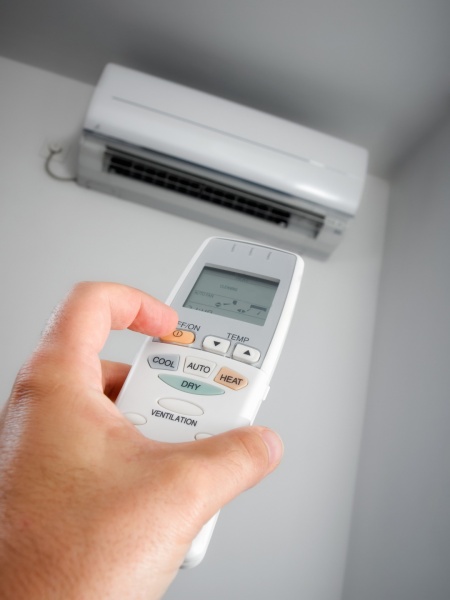
A ductless mini split system is a type of heat pump that provides both heating and cooling without the need for traditional ductwork. It consists of two main components: an outdoor compressor/condenser and one or more indoor air-handling units (often called “heads”). These systems deliver conditioned air directly into different zones of your home, allowing for excellent temperature control, high efficiency, and minimal energy loss.
The Installation Process
- 1. Consultation and Home Evaluation: The first step toward a new mini split installation is scheduling a consultation with a licensed HVAC professional. They will assess your home’s layout, insulation, and heating and cooling needs. During this evaluation, they will recommend the number of indoor units needed and the best locations for maximum comfort and efficiency.
- 2. Choosing the Right System: Mini splits come in different sizes and capacities. Your HVAC professional will help you select a system that matches your home’s square footage and specific requirements. Factors like the number of zones you want to create and the system’s efficiency ratings (SEER and HSPF) will be taken into account.
- 3. Installation Day: On installation day, the outdoor unit is first set up on a stable surface—usually a concrete pad—or mounted on a wall bracket. Then, the indoor units are installed inside the rooms or areas you want to heat or cool. Each indoor unit is connected to the outdoor condenser via refrigerant lines, a condensate drain, and electrical wiring. These lines run through a small three-inch hole in the wall, minimizing disruption to your home’s structure.
- 4. Electrical and Refrigerant Connections: A licensed electrician or HVAC technician will wire the system and connect the refrigerant lines. Proper electrical setup is crucial for the safe and efficient operation of your mini split. The lines are vacuumed to remove air and moisture before the refrigerant is released into the system.
- 5. Testing and Final Setup: Once everything is connected, your installer will test the system to ensure each indoor unit is operating properly and communicating with the outdoor unit. They will also show you how to use the remote controls, program the thermostat settings, and maintain your new system.
How Long Does It Take?
Most standard installations can be completed in one to two days, depending on the number of indoor units and the complexity of the setup. More extensive installations involving many zones may take slightly longer.
Why Choose a Ductless Mini Split?
Besides their flexibility and energy efficiency, ductless mini splits offer quiet operation, easy zoning options, and sleek designs that blend into your home’s décor. Plus, they can significantly lower your energy bills compared to traditional heating and cooling methods.
Ready to upgrade to a ductless mini split? Talk to our team of HVAC experts today! We’ll help you find the perfect system for your home and make the installation process easy, smooth, and worry-free.
Frequently Asked Questions
Question: What is a ductless mini split heat pump, and how does it work?
Answer: A ductless mini split is a heat pump system that heats and cools without ductwork. It uses an outdoor compressor and one or more indoor air handlers, often called heads. Each indoor unit conditions a specific area, giving you zoned comfort, strong efficiency, and less energy loss than many ducted setups.
Question: What are the main steps in ductless mini split installation?
Answer: Installation typically starts with a home evaluation to determine capacity, zoning needs, and ideal unit placement. On install day, the outdoor unit is set on a stable base or bracket, indoor heads are mounted, and lines, drains, and wiring run through a small wall opening. Then the system is connected, vacuumed, tested, and explained.
Question: How long does it take to install a ductless mini split system?
Answer: Many standard installations can be completed in one to two days. The exact timeline depends on how many indoor units you are adding and how complex the layout is. Multi-zone setups with several indoor heads, longer line runs, or electrical work may take longer than a simple single-zone installation.
Question: How do I choose the right mini split size and number of indoor units?
Answer: The right system depends on your home’s layout, insulation, and the rooms you want to heat or cool. During the evaluation, an HVAC professional recommends the number of indoor units and placement for comfort and efficiency. They also match capacity to square footage and your zoning goals, so you do not over or undersize.
Question: What do SEER and HSPF ratings mean for a ductless mini split?
Answer: SEER and HSPF are efficiency ratings used to compare systems. SEER focuses on cooling efficiency, while HSPF relates to heating efficiency. Higher ratings generally indicate better energy performance. When selecting a system, an HVAC professional considers these ratings along with your climate needs, desired zones, and overall comfort goals.
Reach out to Mesaba Heating & Air Conditioning today. Service to you is success to us!